Showing posts with label snack. Show all posts

Wednesday, March 25, 2015

NomNom: Raw Brownies

Raw brownies.

Sounds gross, I know. But it's not--in fact, it's the complete and utter opposite.

Trust.

I made these three times now in the past couple of weeks and every time I make them they are devoured within a couple of days, sometimes two. I can't get over how good these are and that they just have 3 ingredients to them and that baking is not required.

Say what?


I admit I'll roll my eyes at things that are labeled gluten free, vegan, no refined sugar, blah blah blah and ironically this recipe falls under all those labels BUT it is legit good. The texture reminds me of the inside of fig newtons--chewy, sweet, and chocolatey just as brownies should be. 

Go on and try this recipe and let's discuss about how healthy food can actually taste really, really good.

Hope youre having a great week. Xo.


Ingredients (Adapted from Deliciously Ella: Yields 10 brownies)
2 cups of pitted medjool dates 
1 cup of pecans or walnuts
2-3 Tablespoons of raw cacao powder or cocoa powder
2 Tablespoons of maple syrup (optional if you want to make it sweeter but I did not add it)

Procedure
1. Blend pecans or walnuts in food processor until they form crumbly texture then add dates and blend again.

2. Add the cocoa powder and maple syrup if using.

3. Place mixture in baking tray and refrigerate for 3-4 hours or freeze for 1 hour to allow them to set. Keep in fridge for freshness.  

Friday, April 4, 2014

NomNom: M&M Clusters

When I first entered the working world as a pharmacist, I was very much in work mode 24/7. I'd pick up extra shifts to make extra money and had the mentality of 'work/save as much as I can while young and with out responsibilities.' I still somewhat have that mentality but I've also come to realize over the past couple of years that having balance is something that's becoming more and more important to me. Balancing work, time spent with loved ones, blogging to get my creative juices flowing, traveling the world, and practicing yoga for my well being are all things that are important to me for its own reason and I need a good healthy dose of each to keep me happy.

Food and my eating habits also involve this balance I'm talking about today.

I've mentioned in previous posts that I've been trying to eat a bit more healthier these days and not consume so much junk food (chips, fried foods, sweets, etc.) like I usually do, and instead incorporate more vegetables and fruits into my life. So far it hasn't been as bad as I imagined it to be, but I also know myself well enough that I can't give up the "bad for you foods" in its entirety. I enjoy it too much. I'm ok with eating that big slice of cheesecake…and chocolate chip cookie…and bacon…and well you get the idea. It feels so justified after eating a really good spinach salad.


So where does all this talk lead to today?

M&M clusters.

I'm not sure if it's all the carrots and cucumbers I've been snacking on as of late but I've been majorly craving something sweet and salty and this incredibly easy dessert/snack satisfies just that. I first made these clusters over the winter holiday and they have now become a staple in my kitchen because they're incredibly satisfying, easy, and includes ingredients you'll most likely have in your pantry. Warning: there's nothing low fat and healthy about this snack. Oh wait--it has peanuts! Proteins! There you go.

The hardest part about this recipe was waiting for the chocolate to set so I ate my carrots as I waited. True story.

Balance.

I promise my next recipe post will be something super healthy. Have a great weekend. Xo.


Ingredients (Adapted from America's Test Kitchen)
8 ounces of white chocolate, chopped or 1 1/3 cup white chocolate chips
2 cups salted pretzel sticks broken into 1-inch pieces (*make sure you use the thin pretzel rods)
1 cup salted dry-roasted peanuts
1/2 cup mini M&Ms

Procedure
1. Line a baking sheet with parchment paper.  Microwave chocolate in large bowl until melted, about 1 1/2 to 2 minutes.  Stir until smooth and then gently fold in pretzels and peanuts until evenly coated.

2. Drop by heaping tablespoons of mixture onto baking sheet.  Sprinkle M&M’s over the top.  Refrigerate until set, about 30 minutes.

Friday, March 28, 2014

NomNom: Chia Seed Pudding

I've been having an ongoing love affair with chia pudding for a little over a month now and I see this becoming a long term thing. It started with this recipe and I've now become hooked on chia seeds. I'm not a huge breakfast person during the work week because I'd rather just use that time to sleep in, but I now have a breakfast rhythm going on. This is where chia puddings come in. I just prep it the night before and store it in the fridge so that it's happily waiting for me in the morning. A quick reach and grab. Done and done.


It's hard to say which chia recipe I love more because they're both equally awesome--I think I'm more excited that I discovered another chia recipe option that's just as great as the former...you know, in case my palate gets bored.

This recipe calls for fresh berries and almonds as toppings but it's so yummy just with the simple mix of Greek yogurt, almond milk, and vanilla that I've been eating the pudding as is, unadorned. But if you want to, feel free to go ahead with it. You do you.

Low in calorie, super healthy because chia seeds are crazy packed with nutrients, and really tasty. It's a trifecta of all.good.things. What's not to love about that?

Have a great weekend. Xo.


Ingredients (Adapted from Giada De Laurentiis/Food Network Mag Jan/Feb 2014): Yields: 2
1 cup vanilla-flavored unsweetened almond milk
1 cup plain low-fat (2%) Greek yogurt (I used non-fat)
2 tablespoons maple syrup plus 4 teaspoons for serving (I used agave syrup)
1 teaspoon pure vanilla extract
1/4 cup chia seeds
1 pint strawberries, hulled and chopped
1/4 cup sliced almonds, toasted

Procedure
1. In a medium bowl, gently whisk the almond milk, yogurt, 2 tablespoons maple syrup, and the vanilla until just blended. Whisk in the chia seeds, let stand 30 minutes. Stir to distribute the seeds if they have settled. Cover and refrigerate overnight.

2. The next day, in a medium bowl, toss the berries with the remaining 4 teaspoons maple syrup. Mix in the almonds.

3. Spoon the pudding into 2 bowls of glasses; mound the berry mixture on top and serve.

Monday, December 23, 2013

NomNom: Chocolate Covered Peppermint Popcorn

Happy Monday everyone! First, I want to apologize for the lack of posts last week. Some unexpected things came up in my personal life last week and I've been trying to deal with it one day at a time, so blogging was honestly the last thing on my mind. I blog because I enjoy sharing things I love with you, not because it's my job or I have to keep a "blogging schedule," so with that said, my personal life will always comes first. Social media falls after. Although blogging is such an open space to allow random people to peek into your life, I am very much a private person. The irony, right?

Be patient with me. Please and thank you.

Over the weekend, I started to slowly bounce back into my social life and get back into things that make me happy, such as being in the kitchen. Every year, around this time I make something that deals with peppermint candy because not only does it get me in the holiday spirit, but I just love the cool minty flavor when it's mixed in baked goods. This popcorn was an easy-no-BS-once-you-start-to-eat one-you-can't-stop type of recipe that also required very little thinking which is exactly what I needed.


The recipe calls you to crush/whack peppermint candies. I did so with a rolling pin. It was therapeutic.

I then decided to add another layer of chocolate at the end because….I felt like it. I mean, why stop at the white chocolate? It's the holidays so you mine as well go big. Worry about the calories after the holidays.

We'll deal with it together. Xo.


Ingredients
1 bag lightly salted microwave popcorn
1/4 cup crushed peppermint candy (~12 small candy canes)
8 ounces of white chocolate (I used Ghirardelli)
4 ounces of semi-sweet chocolate chips


Procedure
1. Pop your popcorn and transfer to large mixing bowl.

2. Unwrap candy canes and put them in a zip lock bag. Put the bag on top of kitchen towel and whack with a rolling pin to crush peppermint candies.

3. Melt the white chocolate in 30 second increments in the microwave until completely melted and smooth. Add the crushed peppermint candies to the melted chocolate and mix well.

4. Pour melted chocolate/candy mixture to the popcorn and stir well to evenly coat the popcorn.

5. Spread the popcorn mixture evenly on lined baking sheet (I used parchment paper).

6. Melt the semi-sweet chocolate chips in the microwave in 30 second increments until completely melted and smooth.

7. Drizzle the melted chocolate over the popcorn with a spoon.

8. Let it set until the chocolate hardens. You can also pop it in the fridge (~15 minutes) to expedite the process. Once it's hardened, break up the popcorns into chunks and enjoy. Store in airtight container for 2-3 days but trust me, it will be gone by then.


Friday, September 7, 2012

NomNom:Tomato Crostini

So this past week I started having what I thought might be seasonal separation anxiety. I know there isn't a legitimate medical diagnosis for it (I asked the boy, just to be sure) but I started feeling really anxious that summer is over. I dunno. I looked at all the the fresh basil that was still sprouting outside and felt like I just wasn't 100% ready for fall. There are still hints of summer still around whether it be from the humid weather we've been having lately or from the fresh produce I still see at the farmer's market, and that makes it even harder to let go.


I know that pretty soon hints of cool air will greet us in the morning, which also means the basil growing outside will no longer be thriving. Sadness. For this reason alone, I've been on a basil kick recently just so I can optimize this beautiful, fragrant herb I always have at hand and the most recent recipe I made was this ridiculously easy crostini. It was even better because I didn't have to make a trip to the supermarket to buy any of the ingredients needed because I already had everything in my kitchen.


This can be made to be eaten as an appetizer, a side dish, or just as a snack. It's easy, healthy, and so flavorful. Again, did I mention how easy this was?

Have a great weekend. xo

Ingredients (adapted from Bon Appetit magazine Aug 2012) Serves 6-8
2 lb ripe tomatoes, cored, halved, seeded, chopped into 1/4" pieces (I used grape tomatoes)
3 garlic cloves, 2 minced, 1 halved Sea salt and freshly ground black pepper
3 Tbsp extra virgin olive oil plus more for drizzling
1 Tbsp red wine vinegar
1 loaf ciabatta or baguette, cut on a diagonal into 1/3"-thick slices, toasted or grilled
1/4 cup packed fresh basil leaves, coarsely chopped

Procedure
1. Combine tomatoes and minced garlic in a large bowl. Season generously with salt and pepper.

2. Add 3 Tbsp oil and vinegar; toss to mix well. Cover and let tomateos marinate at room temperature, stirring occasionally, for 2-3 hours to allow flavors to develop.

3. Rub one side of toasted bread with cut sides of remaining garlic clove; drizzle bread with oil and cut in half crosswise. Add basil to tomato mixture in a bowl and toss well.

4. Season with salt and pepper. Arrange crostini on a platter. Spoon some tomato mixture on top of each crostini.


Friday, July 20, 2012

NomNom: Strawberry Yogurt Popsicles


When I think of summer fruits, my mind turns to watermelon, cherries, and strawberries. Lately I've been on a strawberry kick and have been eating them as is or cooking them in recipes I've come across, particularly this one that involved these fruits to turn into popsicles. With the summer heat wave we've been experiencing recently on the East coast, what better way to cool down from the scorching temperatures then with refreshing popsicles? 

By the way, this was my first time making popsicles and I can't even believe to tell you how easy they are to make. High five for easy snacks.

Mixing yogurt gives the popsicles a creamy, smooth taste. Smooth like butter.

Whether you stay indoors or brave the hot weather outdoors this weekend, I hope it's a great one. Oh, and don't forget to include these popsicles into your summer rotation;)

Btw, please check out the Washingtonian article I (along with other fashion bloggers) was featured on yesterday regarding summer outfit ideas HERE!

Have a great weekend.

Ingredients (Recipe adapted from www.thekitchn.com) Yields: 6
1 pint strawberries, hulled and roughly chopped
1/4 cup sugar
1 teaspoon lemon juice
6-8 ounces (about 1 cup) Greek yogurt

Procedure
1. Combine the strawberries and sugar in a small bowl. Let stand about 20 minutes to macerate the fruit, stirring occasionally. The fruit will soften and become syrupy.

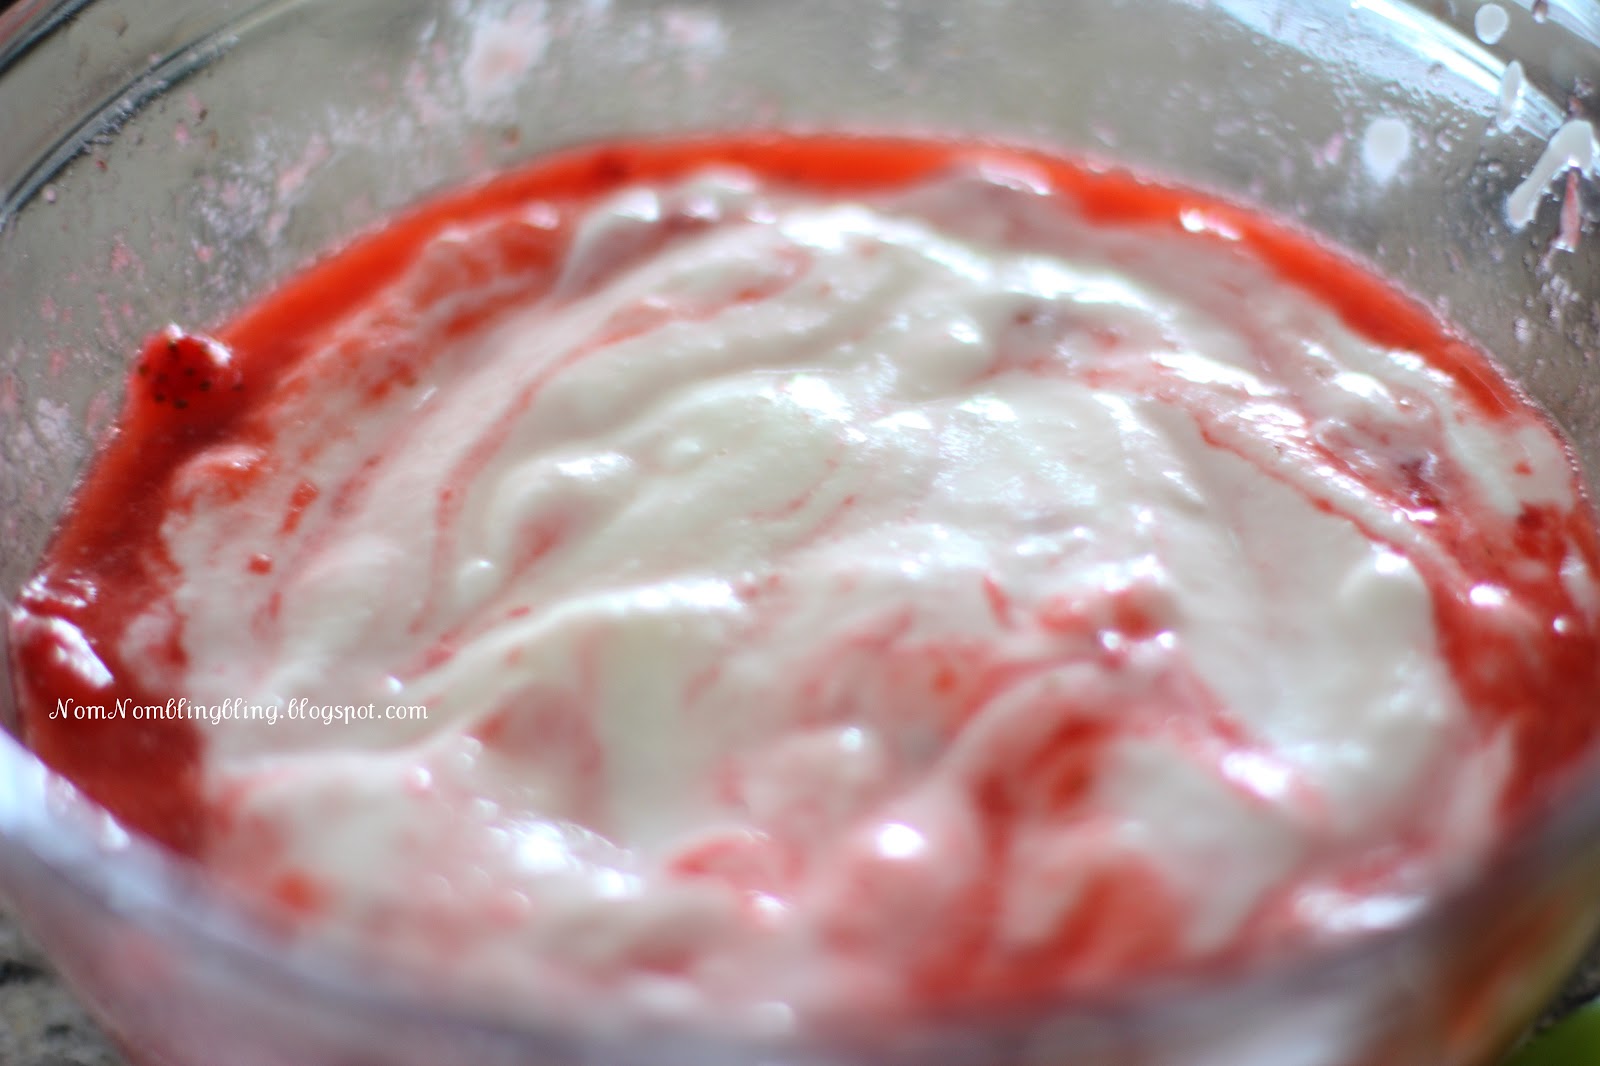
2. Pour the strawberries and syrup into a food processor or blender. Add the lemon juice and pulse a few times until the fruit is pureed.

3. Stir the yogurt into the strawberry mixture until combined. Pour into molds and freeze for at least 8 hours or overnight. To remove, run hot water over the outside of the mold until you can gently pull the popsicle out.

Friday, May 25, 2012

NomNom: Cranberry Granola

Happy Friday everyone!

You know what I absolutely love? Simple recipes that turn out to be GREAT. Can you tell by now I love to make easy stuff? It's a good thing to discover recipes like those because they could change your life in a good, stress free way.

Let's talk granola. Let's talk Greece. It's been about a year since I traveled to Greece and I've been yearning to travel again lately to an undiscovered place. I miss the excitement of traveling to a foreign country and even the stress that comes with planning a big trip to an unknown country. It's a detail oriented process but the end result is so worth it.


One of the things I love to discover during my trips obviously deals with food. While vacationing in Greece, I noticed there would be little snack shops that sold Greek yogurt with toppings! It reminded me of ice-cream shops here in the states--same concept, different key player. When I first had my taste of plain Greek yogurt, I was disgusted. It was bland and sour. Not cool.

I was hesitant to try it again during my trip but hey, I believe in second chances. So here's the thing, they love to drizzle HONEY over their Greek yogurt. What da what? I mean I've seen fruit as toppings but honey?? Maybe I'm new to the game but it was a new concept to me. The yogurt shop also had toppings such as granola and fresh fruit which I added as well, and that was pretty much the end of it for me.

Granola is such an easy, delicious, healthy, bulk yielding thing to make that you'll never want to get store bought stuff. To me, the best way to eat granola is to have it as a topping on Greek yogurt, adorned with your favorite fruit and drizzled in glorious, sweet honey. It's a reminder of my travel to Greece and also a healthy breakfast or snack to have.


How is everyone going to enjoy their extra long weekend? I have a couple of birthday BBQs to attend and shopping on the agenda which I'm looking forward to. BBQS, friends, and shopping=weekend to look forward to.

Have a GREAT weekend.

Ingredients (Adapted from www.allrecipe.com)
8 cup Oat
1 1/2 C Wheat germ
1 1/2 C Oat bran
1 1/2 C sunflower seeds
1 C finely chopped almonds
1 C finely chopped pecans
1 C finely chopped walnut
1 1/2 tsp salt
1/2 C brown sugar
1/4 C maple syrup
3/4 C honey
1 C vegetable oil
1 T cinnamon
1 T vanilla
2 C raisin or dried cranberries

Procedure 
1. Preheat the oven to 325 degrees F (165 degrees C). Line two large baking sheets with parchment or aluminum foil. 

2. Combine the oats, wheat germ, oat bran, sunflower seeds, almonds, pecans, and walnuts in a large bowl. Stir together the salt, brown sugar, maple syrup, honey, oil, cinnamon, and vanilla in a saucepan. Bring to a boil over medium heat, then pour over the dry ingredients, and stir to coat. Spread the mixture out evenly on the baking sheets.

3.  Bake in the preheated oven until crispy and toasted, about 20 minutes. Stir once halfway through. Cool, then stir in the raisins or cranberries before storing in an airtight container.


Friday, May 4, 2012

NomNom: Chorizo Pinto Bean Nachos

My sister and I have a tradition every month or so. Whenever we both are working late on a Friday night, we'll try to meet up for what we call, "a late night vent session" over not so good for you food. 

One of those foods we always try to order are cheesy, some sort of meat involved nachos.

When she told me that she wanted to come over my place, I immediately thought of this chorizo nacho recipe that's been bookmarked for some time now. The only qualm I had with this recipe was that it include beans and this girl is not a fan of any sort of beans. To this day, she's the type of sister that will pick out the beans in her meal and move them over to my plate. How...cute.

But I still went ahead and made these nachos HA. If only you could see the face she made at me when I told her these nachos included beans...

So these might be the best nachos I ever made. That's a pretty bold statement right? But it's true. I don't know if it's a mixture from the smokiness of the chorizo with the habanero cheddar in combination with the bechamel sauce but these nachos are damn good. So good in fact, that my sister didn't pick out the beans! She actually devoured the beans. That speaks volume, no?


Coincidentally, tomorrow is Cinco de Mayo and I can't think of a more fitting dish to help celebrate the holiday by eating these nachos. Oh and let's not forget margaritas;)

Have a great weekend.

Ingredients (Adapted from www.yumsugar.com)
For chorizo and pinto bean topping
1 tablespoon olive oil
1/2 large onion, minced
2 garlic cloves, minced
1/2 jalapeño, seeded and chopped
2/3 pound ground Mexican-style chorizo
1/2 teaspoon chili powder
1/2 teaspoon cumin
Salt and freshly ground black pepper
1 (15-ounce) can pinto beans, drained and rinsed

For habanero queso sauce
1 tablespoon butter
1 tablespoon flour
1 cup milk
1 1/2 cups habanero cheddar cheese (If you can't find Cabot's habanero cheddar, use a good pepper Jack instead), grated

For serving
1 bag of salted tortilla chips
3 green onions, dark greens removed, minced
Salsa, optional for serving
Sour cream, optional for serving
Guacamole, optional for serving 


Procedure 
1. Make the topping: In a large skillet or soup pot, heat the olive oil over medium-high heat. Add the onion, garlic, and jalapeño. Sauté until the vegetables are soft and fragrant, but not browned, about 7 minutes.

2. Add the chorizo, chili powder, cumin, and break up into small crumbles with a wooden spoon. Season generously with salt and pepper. Sauté until the chorizo is browned and almost cooked through, about 8 minutes.

3. Add the beans and stir to combine. Continue cooking to blend the flavors, 5 minutes. 

4. Meanwhile, make the cheese sauce: melt the butter in a large saucepan over medium heat. Once it starts to foam and is completely melted, whisk in the flour, whisking for 1 minute

5. Slowly whisk in the milk. Bring the mixture to a boil, whisking occasionally. Once it starts to boil, immediately remove from the heat and whisk in the shredded cheese by the handful. Keep warm

6. To assemble the nachos: spread the tortilla chips in an even layer on a large serving platter or across four plates. Generously pour the cheese sauce over the chips taking care to cover as many chips as possible.

7. Top with the meat and bean mixture, once again covering all the chips. Drizzle with the remaining cheese sauce and sprinkle with green onions.

8. Drizzle with salsa and dollop with sour cream and guacamole, if using. Enjoy immediately.

Wednesday, April 18, 2012

NomNom: Pimiento Cheese Spread

About a month ago, I came across an article online that talked about the popularity of pimiento cheese sandwiches in the South. I'll be honest with you, I never even heard of pimiento until that article, so the curious side of me quickly googled it and found a bunch of recipes online that used pimientos in a cheese spread or in sandwiches. It was one of those things I bookmarked and told myself I would come back to. Anyway, a couple days later I was flipping through a HGTV magazine and saw the dip featured in their 'chip+dip party' page. I took this as a sign that I needed to make this dip ASAP.


Pimientos are a variety of large red chili peppers so I expected them to be spicy, but instead they were sweet. Totally not what I had in mind. Totally had my reservations at that point. I followed the recipe as is, and took a bite of the cheese spread and was smitten!! The combination of the cheese with the creaminess of the mayo & sour cream, along with the sweet peppers tasted so comforting. The first time I made this, I made it creamy. After making it several times now, I prefer mine to be a bit chunky instead but that is totally up to you. Adjust as you will.


The awesome thing about this easy spread is that it gives you options.

Who doesn't love options?

You can eat it as a dip with chips (or just by the spoonful--that definitely happened), use it to make sandwiches (hello finger food for party!!) or spread it on a burger or a warm, toasted bagel <-----SO DELICIOUS.

One cheese spread that gives you that many choices? That must mean it's some good stuff.

Ingredients (Adapted from HGTV magazine, March 2012)
1/2 lb each grated extra sharp cheddar cheese and pepper jack cheese
1/4 cup each mayonnaise and sour cream
2 tablespoons diced pimientos
Hot sauce
Onion powder
Garlic powder

Procedure
1. Mix cheeses, mayo and sour cream, and diced pimientos.

2. Season with hot sauce, onion powder, and garlic powder.

3. Serve with potato chips or use to make a sandwich.

Friday, March 30, 2012

NomNom: Grilled Cheese With Bacon And Thousand Island Dressing

I remember the first time I discovered that the 'secret sauce' in McDonald's Big Mac sandwich was basically thousand island dressing. I sorta felt cheated. All that time I really had thought they created this special sauce but it is in fact a slight variation (they add garlic and mustard) to a generic salad dressing they used for their burgers. I suppose I can blame that on my unrefined taste buds as a child. I dunno.

I know much better now than to fill my stomach with fast food (minus the once in a blue moon cravings), but as a child, that was probably my favorite burger. When I came across this recipe that uses thousand island dressing in a grilled cheese, I couldn't help but be curious as to what it would taste like.

I'm a cheese lover. In fact, it's very, very, very rare that there is a cheese I don't like. I'm a huge supporter in that I think that cheese makes everything taste better--this is how I feel about bacon. When you add those two components together, well, I mean, what can I say? The idea of a simple grilled cheese sandwich not only conjures up fond childhood memories of my mom making them for my sister and I, but there's also something very comforting about this sandwich. Hmm tomato soup sounds good right about now too...

I made slight variations to the recipe but nonetheless, it was really tasty. Adding thousand island dressing to cheddar cheese and bacon adds another dimension to a simple grilled cheese sandwich that I highly recommend. There are so many variations to a grilled cheese sandwich, so why not start with this one? (It was also noted in the recipe that Greg Morris, owner of Oaks Gourmet in Los Angeles makes it every Wednesday at his shop's Grilled Cheese Night).
I'm off to the Bahamas today--in fact by the time you read this I'll probably be on the way! Posting will be sparse and I hope to resume by later next week, but I wanted to leave you with this recipe because I think it's something worth making.

Have a great weekend.

Ingredients: Yields 4 sandwiches (Adapted from Food Network Magazine, Apr 2011)
8 strips thick-cut maple-glazed bacon (I used turkey bacon)
2 tablespoons unsalted butter, plus more as needed
8 slices sourdough bread (I used wheat bread)
12 ounces cotswold cheese (double Gloucester with chives) or cheddar, shredded
4 tablespoons Thousand Island dressing

Procedure
1. Cook the bacon in a large nonstick skillet over medium heat until crisp, about 8 minutes. Remove and drain on a paper towel-lined plate.Wipe out the skillet.

2. Heat the butter in the skillet over medium heat. Add 2 bread slices. Top each with one-quarter of the cheese and 2 strips bacon. Spread 2 bread slices with some of the dressing and press them on top of the sandwiches, dressing-side down. Cook until the cheese melts and the bread is golden, 3-4 minutes per side. Repeat to make 2 mores sandwiches, adding more butter as needed.


Friday, March 16, 2012

NomNom: No Cook Chocolate Pudding

You know those days when you come home from a long day of work and look through your fridge to see if there's anything good to snack on? Okay, maybe that's just me but I've had plenty of days like that recently due to long hours at work. Sometimes I just like to have something that's ready-to-eat-no-heating required-kind of food in my kitchen so I can take a bite of whatever deliciousness that is readily available while standing in my kitchen. Yea, standing. Is that weird? I dunno.

When I was younger, my mom would often times pack me those Jell-O pudding snacks for lunch and I would devour it because that would satisfy my sweet tooth. Now that I'm much older and more ahem "adult like" I figured it's due time to try my hands on home made chocolate pudding.


You know how they say the book is always better than the movie version of it? I apply that to food as well. Homemade versions are always, always better. This pudding is easy (NO COOKING required people!!), decadent, and not overtly sweet because it uses both bittersweet chocolate and unsweetened cocoa powder.

With the warm weather we've been having, how perfect would a refreshing bite of chocolate pudding sound to you?

Have a great weekend.


Ingredients: Yields 4 (Adapted from Fine Cooking magazine)
1 3/4 cups heavy cream
2 Tbs. unsweetened cocoa powder, preferably Dutch-processed
8 oz bittersweet chocolate, finely chopped (1-1/2 cups)
2 oz (1/4 cup) unsalted butter, cut into four pieces
2 Tbs granulated sugar
1 tsp pure vanilla extract
Pinch table salt
Sweetened whipped cream and chocolate shavings for garnish (optional)

Procedure
1. Have ready six 4- to 6-ounce ramekins or teacups. Heat the heavy cream in a small saucepan or microwave until just boiling. Remove from the heat and whisk in the cocoa until smooth.

2. Add the chocolate, butter, sugar, vanilla, and salt, and whisk until the chocolate and butter are melted and the mixture is smooth.

3. Pour the mixture into the ramekins or cups. Depending on the size of your ramekins, they’ll be filled about two-thirds to three-quarters of the way. Cover with plastic (not touching the surface of the puddings) and refrigerate until chilled and thickened, at least 6 hours or up to three days.

4. Serve with a dollop of sweetened whipped cream and a few chocolate shavings, if you like.

Friday, January 6, 2012

NomNom: Chocolate and Salted Caramel Mug Cake

So let's continue talking about this weather. For the past couple of days, it's been cold--as in frigid, sniffle-inducing-just-by-staying-outside for-one-minute-cold. What's up with the sudden winter slap in the face, mother nature? The other day I had a day off from work and didn't go out at all because of the weather....well other than to walk my dog but that doesn't count. The cold made me want to hibernate inside, be lazy, and be anti-social. I was even too lazy to cook something so I might've had PB+J for dinner. Maybe.

I wanted to eat something comforting and chocolate-y. Lots of girls have this love affair with chocolate but for some reason I'm not part of that crew (except for white chocolate). I don't know why but I only like chocolate whenever I have a craving for it which is actually quite rare. But then that rarity happened a couple days ago.

 
As I was perusing through my list of "must make" items I forgot that about this recipe I wanted to try. The recipe said 1.5 minutes and chocolate cake and well umm hello? I took that as a sign from the chocolate gods.


So you know that saying about opposites attract? Well this is the prime example of that. It's sweet and salty and it takes all of 1.5 minutes to bake. I'm serious. Would I lie to you??

Enjoy this easy as pie (or cake) recipe and have a bite for me. Have a great weekend.

Recipe: Makes 1 mug cake (adapted from www.babble.com)
4 tablespoons all purpose flour
4 tablespoons sugar
3 tablespoons unsweetened cocoa powder
1/4 teaspoon baking powder
1/4 teaspoon salt
1 egg – beaten
3 tablespoons skim milk
1 tablespoon vegetable oil
2 salted caramels (If you can’t find salted caramels you can sprinkle a little fleur de sel salt into the mixture as you’re dropping in the caramels).

Procedure:
1. Into a small bowl add: flour, sugar, cocoa, baking powder, salt, egg, milk, and vegetable oil. Mix to combine.
2. Pour mixture into a regular sized coffee mug. Drop caramels into center of mixture one at a time.
3. Microwave on high for one minute and 30 seconds. If needed (if cake batter is still gooey), microwave on high for up to an additional 30 seconds. (*I microwaved it for one minute and 15 seconds because I didn't want it to come out too dry).