Showing posts with label recipe. Show all posts

Thursday, November 12, 2015

NomNom: Soba Noodle Salad

I've always had mixed feelings towards Fall. Like most people, I enjoy the crisp change in the air and Fall fruits/veggies, but do so with reservations because I know that summer has ended (sad) and winter will be coming soon (very sad). Winter and I are not friends in case you haven't noticed already.

My friends make fun of me for never wanting to leave my house when the temperatures drop to freezing because I would rather cozy up on the couch all snuggled in my PJs, netflix, and a glass of wine. Am I lame? That's cool, I'm okay with it.

When I hibernate during the winter like a wimp, I start to day dream about sunshine, the beach, and anything summer related--including food. The recipe I'm sharing with you today takes me back to this past summer because it was on heavy rotation in my kitchen due to the easiness of preparation and well, eating cold noodles is just a staple in Asian cuisine to combat the hot weather.


Soba noodles are made of buckwheat flour and is common in Japanese cuisine. The noodles have a slight nutty flavor and is usually eaten cold with a dipping sauce which I actually don't prefer but I do love it when prepared as a noodle salad. Feel free to use whatever vegetables you may have in your fridge but I personally like the fresh bites of cucumbers and the slight sweetness bell peppers bring to the dish so those are usually a must for me. Since I always have kale in the fridge I threw that in too, especially because kale holds up so well in dressings and won't wilt. Yup, we are still on that kale bandwagon.

Not only is this dish a delicious and light meal, it is a surefire way for me to eat my veggies and hopefully for you as well.

Have a great week. Xo.


Ingredients (Adapted from Food Network): Yields 4 servings 
1 package of soba noodles
1 carrot thinly sliced
1 cucumber, thinly sliced
1 bell pepper, julienned
2 cups of chopped kale
2 teaspoons of sesame oil
4 Tablespoons of rice wine vinegar
2 teaspoons of sriracha
5 Tablespoons of soy sauce
1/2 lime, juiced
3 cloves of garlic, minced
1 Tablespoons of ginger
4-5 Tablespoons of olive oil
3 Tablespoons of roasted sesame seeds for garnish (optional)

Procedure
1. In a medium stock pot, boil water, add salt, and cook noodles according to package directions (about 7-8 minutes). If water threatens to boil over, add 1/2 cup of cold water. When finished, rinse noodles with cold water. Drain and set aside.

2. In a medium bowl combine sesame oil, vinegar, soy sauce, sriracha, olive oil, lime juice, garlic and ginger. Mix thoroughly and then combine prepared vegetables and noodles.

3. Garnish with sesame seeds.

2 tsp. sesame oil
4 tabs. rice wine vinegar
1 tsp. sirachi
5 tabs. soy sauce
1 chili, minced
3 cloves garlic, minced
2 tabs. hoisin
1 tab. ginger
1/2 lime juiced
4-5 tabs. olive oil

Saturday, April 11, 2015

NomNom: Coconut Maple Granola

Happy Saturday!!

I don't know how you're feeling right now but I am so happy the weekend is finally here. It's been a busy past couple of weeks in terms of transition and I don't really see it slowing down anytime soon. So when the weekend rolls around I have been savoring the sleeping in part and having a lax weekend schedule so much more.


I love when I find time to actually be in my kitchen in the morning to cook a proper breakfast of some sort instead of standing in my kitchen with one hand on my cup of coffee while furiously trying to stuff my face with toast or something quick to grab and trying to check neglected email before rushing out the door for work. Life.

This granola recipe has been my go to for a year now and I'm not sure why I haven't posted the recipe yet but I'm excited to share this with you because it is just so darn good. I usually make a huge batch of it so that it will last me for weeks and it's also one of those things that is easily transportable for work and will keep you full. The key players which makes this granola a little special than the rest is the coconut oil mixed with maple syrup. That combination just brings a certain kind of depth to the granola.

Try it out and you'll see what I mean.

HAPPY GAME OF THRONES WEEKEND!!! Xo.


Ingredients (Recipe adapted from Shutterbean: Yields: 6 cups)
3 cups rolled oats 
3/4 cup raw almonds 
1/4 cup cranberries
1/2 cup sweetened coconut shreds 
1/3 cup coconut oil, melted 
1/4 cup maple syrup 
1/8 cup brown sugar 
2 tablespoons chia seeds
1/2 teaspoon kosher salt

Procedure
1. Preheat oven to 350F. In a large bowl, combine oats, almonds, coconut shreds, chia seeds, coconut oil, maple syrup and stir. When thoroughly saturated, add the brown sugar on top and continue to stir. Season with salt and spread the granola in an even layer on a large rimmed baking sheet.

2. Bake in the oven for 25-30 minutes making sure to stir granola evenly every 10 minutes or so. In the last 5 minutes, add and stir in the cranberries. Let granola cool and transfer to an air tight container. It will last up to two weeks.


Wednesday, March 25, 2015

NomNom: Raw Brownies

Raw brownies.

Sounds gross, I know. But it's not--in fact, it's the complete and utter opposite.

Trust.

I made these three times now in the past couple of weeks and every time I make them they are devoured within a couple of days, sometimes two. I can't get over how good these are and that they just have 3 ingredients to them and that baking is not required.

Say what?


I admit I'll roll my eyes at things that are labeled gluten free, vegan, no refined sugar, blah blah blah and ironically this recipe falls under all those labels BUT it is legit good. The texture reminds me of the inside of fig newtons--chewy, sweet, and chocolatey just as brownies should be. 

Go on and try this recipe and let's discuss about how healthy food can actually taste really, really good.

Hope youre having a great week. Xo.


Ingredients (Adapted from Deliciously Ella: Yields 10 brownies)
2 cups of pitted medjool dates 
1 cup of pecans or walnuts
2-3 Tablespoons of raw cacao powder or cocoa powder
2 Tablespoons of maple syrup (optional if you want to make it sweeter but I did not add it)

Procedure
1. Blend pecans or walnuts in food processor until they form crumbly texture then add dates and blend again.

2. Add the cocoa powder and maple syrup if using.

3. Place mixture in baking tray and refrigerate for 3-4 hours or freeze for 1 hour to allow them to set. Keep in fridge for freshness.  

Wednesday, March 4, 2015

NomNom: Blueberry Coffee Cake Muffins

Last week I had this random craving for fresh blueberries (this might have been influenced from me longing for spring/summer weather) so took a trip to the grocery store to buy some.

I decided that one of the most disappointing things in life is when you look forward to eating something what you imagine to be really good and you take a bite and it tastes….flat. ULTIMATE LETDOWN. It's on the same level as when you are looking forward to eating something you know you have in your fridge (leftovers from a delicious meal, a really good slice of cake, etc) and you come home to find out that somebody already ate it. Yea, that's definitely happened to me and no, I'm still not bitter about it…..

So the blueberries I bought ended up being extremely tart and no where close to tasting sweet. I was so disappointed and was thisclose to tossing them in the trash but the practical side of me kicked in and thought why not use these to bake something. Sugar is always involved during baking so that would help these lame blueberries out, right?! Right. Enter my spirit animal, Barefoot Contessa.


These muffins are perfectly moist, light, and have just the right amount of sweetness to them. It has a cake like texture and could be used as the base for any muffins actually. I see chocolate chip muffins or strawberry muffins in the near future. Summer, where are you?

A good cup of coffee along with eating a couple of these blueberry muffins could really jump start you into a good morning so be sure to get on that train.

Hope you're having a great week. Xo.


Ingredients (Adapted from Barefoot Contessa) Yields: 20 muffins
12 tablespoons (1 1/2 sticks) unsalted butter, at room temperature
1 1/2 cup sugar
3 extra-large eggs, at room temperature
1 1/2 teaspoons pure vanilla extract
8 ounces (about 1 cup) of sour cream (I used light sour cream because that's all I had)
1/4 cup milk (I used unsweetened almond milk)
2 1/2 cups of all-purpose flour
2 teaspoons baking powder
1/2 teaspoon baking soda
1/2 teaspoon salt
2 half-pints blueberries, picked through for stems

Procedure
1. Preheat oven to 350 degrees F. Place 16 paper liners in muffin pans or lightly spray muffin pans with cooking spray if not using liners.

2. In the bowl of an electric mixer fitted with paddle attachment, cream the butter and sugar until light and fluffy, about 5 minutes. With the mixer on low speed, add the eggs 1 at a time, then add the vanilla, sour cream, and milk. In a separate bowl, sift together the flour, baking powder, baking soda, salt. In another bowl, lightly coat blueberries with flour. This will prevent the blueberries from sinking.

3. With the mixer on low speed add the flour mixture to the batter and beat until just mixed. Fold in the blueberries carefully with a spatula and be sure the batter is completely mixed.

4. Scoop the batter into the prepare muffin pans filling each cup just over the top and bake for 25-30 minutes, until the muffins are lightly browned on top and a cake tester comes out clean.


Friday, February 13, 2015

NomNom: Brazilian Truffles

Since Valentine's day lands on a Saturday this year that means you have time to spend in the kitchen (or not) and put extra love into that meal or in today's case, dessert. This sweet truffle concoction, called a Brigadeiro, comes from Brazil and requires just 3 ingredients. They are so easy to make yet yields something so pretty that also looks like much effort was put into it that you're going to look like a dessert hero. I got you, friend.

This is a very adaptable truffle recipe when it comes to toppings. Since Valentine's day is tomorrow I figure it would be fitting to add heart shaped sprinkles and anything red/pink. Very girly. Very Valentines Day. However I like chocolate flavors mixed with nutty flavors so I included chopped walnuts in my toppings (a personal favorite). Feel free to get creative and cover these addicting sweets to your hearts desire with other nuts such as pistachio, peanuts, or almonds. These truffles don't taste like the standard rich truffles but lean towards the caramel-y ooey gooey goodness side--totally not a bad thing.


However you spend your Valentines day or this weekend, these truffles should be included in your plan. Have fun decorating and enjoy eating these treats.

Have a great weekend. Xo.


Ingredients (Adapted from http://www.foodnetwork.com/recipes/giada-de-laurentiis/brazilian-style-truffles.html) Yields: 24 truffles
1 can of sweetened condensed milk (14-ounce)
2 tablespoons of butter, plus extra for your hands
2 tablespoons of unsweetened cocoa powder
1/2 teaspoon vanilla extract
1/8 teaspoon fine salt
sprinkles, for coating
chopped walnuts for coating

Procedure
1. Combine the condensed milk, butter, cocoa powder, vanilla and salt in small saucepan. Place over medium heat and bring to simmer, stirring constantly with a wooden spoon. Reduce the heat to medium-low and continue stirring until the mixture thickens and when stirred, pulls away from the bottom of the pan, about 10 minutes.

2. Remove from the heat and place the mixture in a greased shallow pan. Refrigerate until chilled all the way through about 2 hours.

3. Lightly butter your hands. Using a tablespoon or small scoop, scoop some of the truffle mixture into your hands and roll into a bite-size ball. Roll the truffle in one of the coatings and place on a plate. Continue with the remaining chocolate. Store the truffles in the refrigerator for up to a week.


Friday, January 23, 2015

NomNom: Cauliflower Garlic "Mashed Potatoes"

So I just realized that my first food post of 2015 is a vegetable dish. Serious identity crisis going on over here....who am I?

But this recipe is special--so much so that I unknowingly decided to feature it as the first food post for the new year because it's just that solid. No potatoes were used in this recipe unlike other "mashed potato" recipes I came across which used a mix of potatoes and cauliflower. The crazy awesome thing about this recipe is that it mocks the exact taste and texture of garlic mashed potatoes. Winning.

I first utilized this recipe two Thanksgiving ago and totally tricked my sister and dad into thinking they were eating mashed potatoes throughout dinner. It was hilarious. During the meal I was asking my sis what she thought about my new recipe and she was like "this is pretty good! What different ingredients did you use?" I 100% lied to their faces and told them it was a new mashed potato recipe I used and omitted that teeny tiny important fact that I only used cauliflower. Boom.


If I could trick the two people I know who have strong aversions to foods that are characterized as healthy, then you know this recipe is a good one. Since that thanksgiving dinner, this recipe has been on heavy rotation and whenever I make it for the family, I always remind my sister of that time I tricked her into thinking she was eating mashed potatoes....because that's just what older siblings do. Le duh.

On a side note, the blog will be on hiatus for a couple weeks because I'm leaving for Paris/London this weekend! Looking forward to this trip especially because it will probably be one of the last international vacations I will take for awhile. More on that later;)

Have a great weekend. Xo.


Ingredients (Adapted from Food Network) Yield: 4 servings
1 medium head cauliflower
3 tablespoons cream cheese
2 tablespoon Greek yogurt/light sour cream
1/4 cup grated Parmesan
1 teaspoon minced garlic
1/8 teaspoon straight chicken base or bullion (may substitute 1/2 teaspoon salt)
1/8 teaspoon freshly ground black pepper
1/2 teaspoon chopped fresh/dry chives (for garnish)
3 tablespoons unsalted butter

Procedure
1. Set a stockpot of water to boil over high heat.

2. Clean and cut cauliflower into small pieces. Cook in boiling water for about 6 minutes, or until well done. Drain well in colander; do not let cool and pat cooked cauliflower very dry between several layers of paper towels.

3. In a bowl with an immersion blender, or in a food processor, puree the hot cauliflower with the cream cheese, Greek yogurt, Parmesan, garlic, chicken base, and pepper until almost smooth.

4. Garnish with chives, and serve hot with pats of butter.

**Try roasting the garlic and adding a little fresh rosemary for a whole new taste.


Friday, December 19, 2014

NomNom: Molasses Cookies

I hope I'm not the only one that is feeling all sorts of alarmed that Christmas is less than a week away. How did that even happen?! I love the holidays around this time but for some reason I feel like Christmas this year creeped up way faster than usual which has me doing the last minute holiday scramble which includes baking holiday cookies!

I've been on a spice kick lately which has transcended to my dessert cravings, so allow me to introduce to you today's most soft, chewy, and perfectly spiced molasses cookies. If these don't scream holiday cookies to you then…we can't be friends. Heart you.


There's a wonderful harmony of ginger, cloves, cinnamon, and sugar that blend so well together in these cookies that it's hard to eat just one. The lack of self control I have at times had me inhale three cookies in a row after impatiently watching them cool. Classy, I know.

I'd like to think that the flavors in these cookies are an homage to this holiday season and since Christmas is right around the corner it only makes sense to bake them today. Or this weekend. Basically, soon.

These molasses cookies. Glass of milk/hot chocolate. Watching cheesy, holiday movies (my favorites are Elf and The Holiday) in your PJs.

Have a great weekend. Xo.


Ingredients (Adapted from All Recipes) Yields: 30 cookies
3/4 cup softened unsalted butter
1 cup brown sugar
1 egg
1/4 cup molasses
2 cups all-purpose flour
1 teaspoon baking soda
1/2 teaspoon salt
1.5 teaspoon cinnamon
1 teaspoon ginger
1 teaspoon ground cloves
1/2 cup sugar

Procedure
1. In a medium bowl, mix together the softened butter, 1 cup brown sugar, and egg until smooth. Stir in the molasses. Combine the flour, baking soda, salt, cinnamon, cloves, and ginger; blend into the molasses mixture. Cover, and chill dough for 1 hour.

2. Preheat oven to 375 degrees F (190 degrees C). Roll dough into walnut sized balls and roll them in the white sugar. Flatten gently with your palm or smooth bottom of glass cup. Place cookies 2 inches apart onto ungreased baking sheets.

3. Bake for 7-9 minutes in the oven, until tops are cracked (recommend 7-8 min for soft and chewy texture). Cool on wire racks. 

Friday, December 12, 2014

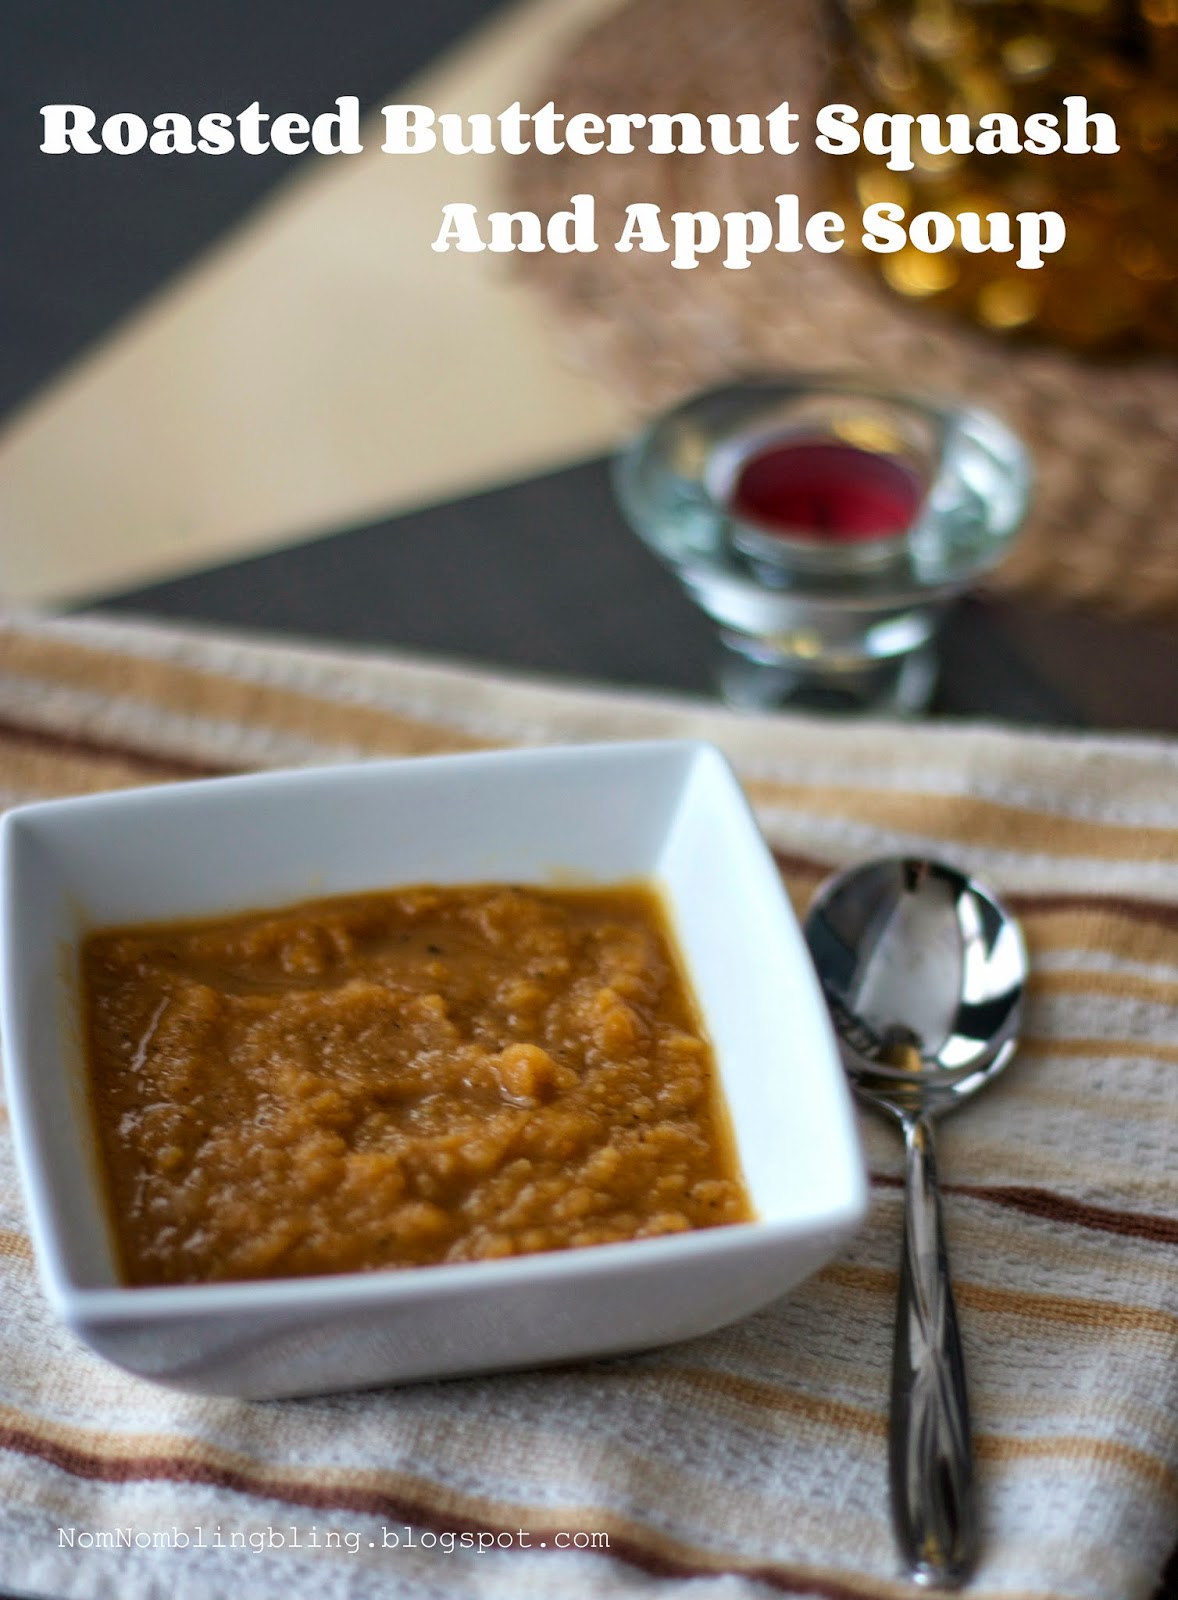
NomNom: Roasted Butternut Squash and Apple Soup

One of the things that brings me joy is sharing recipes and having food related conversations amongst friends. The simple enjoyment and shared curiosity of eating good food together are one of the many things that brings my friends and I together.

When a couple of girlfriends and I were planning one of our good friend's bachelorette party several years ago, we asked the bride to be how she wanted to celebrate and she told us that she wanted to go to NYC for the weekend to simply eat at all the restaurants that was on her list. A trip based solely on eating good food with your gal pals? Done and done. While planning her party, my friends and I literally made a google map of all the food places she wanted to try so that we could optimize our time in the city. Because that's just how we roll when it comes to food, though I'm pretty sure we came back home 5 lbs heavier. Whatever.

Today's soup recipe loosely comes from a potluck my friend Mel hosted a month ago which was based around a Fall theme. Another friend, another food story;) She made this exceptionally awesome butternut squash soup which I basically fell in love with that night and after she shared the recipe and tweaking it a bit in my kitchen to make it exactly how I would imagine the best butternut squash soup to taste like, I give you today's perfect winter soup. It has the perfect balance of sweetness and spices after the addition of spice measurements I included to the recipe. Oh, and please don't skip the step with roasting the garlic head because...roasted garlic in olive oil. Enough said.


The simplicity of this recipe and the earthiness it yields is so worth making. A perfect way to nourish and warm the body during these cold winter days.

Have a great weekend. Xo.


Ingredients (Yields: 6 servings)
2 lb butternut squash, halved and seeded
1 garlic head, halved crosswise
2 Tablespoon of unsalted butter
1 teaspoon olive oil
1 yellow onion, thinly sliced
2 apples, peeled, cored and thinly sliced
4 cups of low-sodium chicken broth (or vegetable)
2 small bay leaves
freshly ground pepper, salt
3 tablespoons of freshly chopped sage
1/2 teaspoon curry powder
1/4 teaspoon nutmeg

Procedure
1. Preheat oven to 400 F. Rub cut garlic surfaces with olive oil and put halves back together to reassemble garlic head. Wrap tightly in foil, bake for 40 minutes (bake this with the squash).

2. Line baking sheet with parchment paper. Brush the cut sides of the squash with olive oil; season with salt and pepper. Place the squash cut side down on the baking sheet. Roast until tender, about 40-45 minutes, 400 F. 

3. Meanwhile, in dutch oven or stockpot, melt butter. Add onion and cook until soft but not browned for about 10-13 minutes.

4. When the squash is cool enough to handle, remove and discard the peel. Cut the squash into large pieces and add to dutch oven along with sliced apples, broth, 2 tablespoons of sage, bay leaves, salt, pepper, curry powder, and nutmeg. Stir to combine and bring to boil and reduce to simmer. Partially cover the pot and simmer for 30 minutes. Remove bay leaves and discard.

5. Meanwhile, unwrap garlic from foil. Squeeze from skin into bowl and discard skin. Mash in bowl with fork and stir into soup.

6. Using immersion blender, puree the soup directly in the pot until smooth. 

7. Garnish with pepper and remaining sage leaves, serve immediately.

Friday, November 21, 2014

NomNom: Pumpkin Cake with Cream Cheese Frosting

Fall evokes many things for me. It's a season of change where the chill in the air is more noticeable and you know that winter is creeping right around the corner. I have an aversion to freezing temperatures so hibernation mode has been on this week since mother nature apparently wanted us to experience a glimpse of winter already. However, I love that I can finally take out my warm sweaters, coats, and cozy scarves and know that my favorite holidays will also be coming up soon.

In terms of food, I'm not a huge pumpkin person. I know people get giddy as soon as Starbucks puts their pumpkin spice latte on the menu but I just can't get on board with that excitement. That drink just tastes awful to me. Same goes for pumpkin pie. Not only do I think that it's just way too much pumpkin flavor for me but I dislike the texture of it so it's always been a pass for me whenever I see it on the menu/table. Not even a second glance.


Pumpkin bread has always been the exception and a favorite for me, but it's also one of those tricky desserts where it has to have the perfect balance of spices and sweetness to evoke just the right amount of pumpkin spice taste. When I came across this pumpkin cake recipe, I was fully interested in making it since the ingredients needed were similar to my go to pumpkin bread recipe, only with slight differences.

So let's talk about the cream cheese frosting. I don't even like frosting but cream cheese frosting is special. It gets me. There is nothing new about cream cheese frosting but the combination of pumpkin cake with cream cheese together is really something. A relationship that makes absolute sense, similar to carrot cake and cream cheese. Trust me when I say that this is the perfect pumpkin cake with equal parts sweetness and spices that is decadently moist <---KEY. I mean I'll just put it this way--my newfound problem with portion control I never knew I had suddenly had became an issue when eating this cake.

After reading people's review on this recipe, the only changes I made was adding a teaspoon of vanilla extract, increasing the ground ginger amount, and decreasing the sugar in the frosting. This recipe is 1000 percent going into my recipe archives and will debut again for Thanksgiving per the request of loved ones and for the purpose of having leftovers. Because cake for breakfast is always a good idea. In bed. Crumbs optional.

Have a great weekend. Xo.


Ingredients (Adapted from http://southernfood.about.com/od/pumpkins/r/bl30212s.htm)
2 cups of sugar
1 cup vegetable oil
4 large eggs
2 cups all-purpose flour
2 teaspoons baking soda
2 teaspoon ground cinnamon
1 teaspoon ground ginger
1 teaspoon vanilla extract
1 teaspoon baking powder
1/2 teaspoon salt
2 cups pumpkin puree or cooked mashed pumpkin

Cream Cheese Frosting
1/4 cup butter
1 package (8 ounce) cream cheese, room temperature
2 1/2 cup confectioners sugar
2 teaspoons vanilla extract
1/2 cup chopped pecans


Procedure
1. Combine sugar, vegetable oil, and eggs in a large mixing bowl; mix well.

2. Sift dry ingredients in separate bowl; stir into oil mixture, beating well. Stir in pumpkin puree.

3. Pour batter into two greased and floured 9-inch round layer cake pans. Bake at 350 degrees for 35-40 minutes. Turn onto racks to cool. Frost pumpkin cake with cream cheese frosting and sprinkle with chopped pecans.

Cream Cheese Frosting
1. Beat the butter and cream cheese until smooth and creamy. Add the sifted confectioners' sugar and 2 teaspoons of vanilla extract; beat until smooth. Makes enough for 2-layer cake or 1 large round cake.

Friday, September 19, 2014

NomNom: Moroccan Spiced Roasted Chickpeas

A habit I've been trying to get better at is snacking healthier. I used to snack on chips if I had to be at work all day and other not so good for you things I could get my hands on but have made a proactive decision this year to swap out those chips for something healthier like...baked chips. Kidding. Kind of.

Fortunately I love legumes and chickpeas/garbanzo beans is no exception and when I came across a recipe that roasted the beans, which turns them into something crunchy, I was intrigued. Story of my life.


Lately, documentaries and roasted chickpeas have been a thing in my life. I've been watching lots of documentaries on Netflix (it all started with watching Jiro Deams of Sushi to prep for my trip to Japan 5 months ago) and since I like to munch on something as I watch movies, or these days, documentaries, these crunchy, healthy, protein packed snacks have been fitting for the occasion...along with a glass of wine because you know, wine is always a good idea.

Have you guys seen the documentary Somm? It's about the road to becoming a master sommelier--who knew it would be that intense to become one?! My God. I have a new found respect for them if I see one listed at a restaurant. The documentary is fascinating in that it takes you into the world of professional trained sommeliers. The most recent documentary I've been loving these days has been The Mind of a Chef which spotlights on a specific chef and his culinary adventure on how he approaches food and dishes along with glimpses of his friendships with other well respected Chefs. I recently hung out with a good friend of mine last weekend who watches the show as well and we were discussing about one of the episodes from the first season where Chef David Chang makes gnocchi out of packaged ramen. WHAT. Mind blown. Such a fantastic documentary series if you are interested in food and cooking.

But back to my beloved chickpeas. Don't say I didn't warn you when I tell you that these are a-d-d-i-c-t-i-n-g. When I first made them, I used one can and finished it all by myself. In a day. Hello gluttony. The second time around, I made 3 cans worth. You live and learn folks, you live and you learn.

A couple of things to note about this recipe. Make sure the beans are super dry before putting them in the oven (helps with the crunchy texture) and have fun experimenting with different spices. These can be just as good with using simple ingredients such as olive oil, salt, pepper, and garlic powder or if you want to go the sweet route, try this recipe for honey cinnamon roasted chickpeas.

Cheers to roasted chickpeas and good documentaries. Have a good weekend. Xo.


Ingredients
1 can of chickpeas (garbanzo)
1 Tablespoon olive oil
2 Tablespoons Ras El Hanout spice (spice recipe from my harira soup)


Procedure
1. Preheat oven to 400 degrees F.

2. Rinse and strain beans under cold water thoroughly to remove starch. Spread them out on baking sheet and pat dry with paper towel. Remove any of the skin from the beans that may peel (not necessary but I like to remove them). Let it air dry for 10 minutes.

3. Once they are dry, place baking sheet of chickpeas into oven for 15 minutes and roast them. Remove from oven and drizzle olive oil and spice mixture, making sure all the chickpeas are evenly coated.

4. Place back into oven and roast for 25 more minutes until crispy. Remove baking sheet and transfer to serving bowl. Store at room temperature.

Friday, August 29, 2014

NomNom: Strawberry Chia Seed Jam

The amount of fresh fruit that has been consumed this summer has been over the top. I say that it's like a bad thing and it's technically not (hello, vitamin A+C!) but considering how much I'm able to consume in one sitting is…alarming. Strawberries, watermelons, cantaloupes, blueberries, and now peaches. Fruit monster<------me.

When strawberries were in season a couple months ago, I decided to take a jab in jam making because it's one of those incredibly easy things to make that buying it at the grocery store almost seems shameful. It also made me realize how sweet store bought jam is compared to what you can make at home. Not a good thing.


I've mentioned before that chia seeds take on a gelatinous texture when immersed in liquid and the great thing about chia seeds in this recipe is that it will inflate when mixed in with the jam so it substitutes the sugar component by acting as the thickening property.

Oh chia seeds, you and your cool properties.

My breakfast as of late has been spreading my beloved almond butter on top of toast/english muffin and then adding my chia jam on top. Ugh, so good.

Even though strawberries aren't in season anymore, I encourage you to utilize whatever fruit is in season right now (peaches!) and go to town with it.

Have a great holiday weekend. Xo.


Ingredients (Adapted from www.thekitchn.com) Yields 6-8
2 cup strawberries 
Half a lemon, juiced
1 to 2 tablespoons honey
2 tablespoons chia seeds


Procedure
1. In a small saucepan over medium heat, combine the strawberries and lemon juice. As the fruit heats up and the juices bubble and boil, smash the fruit using the back of a fork until they break down. This should take 3 to 5 minutes.
2. Sweeten the mashed fruit with 1 to 2 tablespoons of honey, to your liking. Add the chia seeds and stir once. Remove from the heat and let the jam set for about 5 minutes to thicken. Cool and transfer to an air tight container and refrigerate. (Makes about 1 cup of jam)
This jam will keep for 2 weeks in the fridge.

Saturday, August 2, 2014

NomNom: Marinated Watermelon and Tomato Salad

Summer so far has been nothing short of amazing. Testing new recipes with fresh seasonal vegetables from the CSA, a quick and fun trip to LA, taking my running on the treadmill to outdoors, weekend trips to the local farmers market to consume my weights worth of melons/watermelons, all while hanging out with loved ones have brought along great memories for summer '14 thus far.


I'm not kidding when I say this but I could easily finish a 5 lb baby watermelon in a day. By myself. I mean, it's borderline obnoxious how much I've been eating this sweet, juicy fruit the past month and believe it or not, those deceiving looking yellow things pictured are watermelons! I discovered that yellow-fleshed watermelons existed last week (found at the farmers market) and have been consuming them like a boss. I can't get enough of fresh summer produce and today's recipe takes watermelon to the next level. After discovering this salad, I just can't be bothered with eating watermelons by itself anymore, let alone normal looking red fleshed watermelons. #Sorryimnotsorry.

#Kidding.

Summer eating should be about fresh, sweet, juicy, and citrusy things--foods that make you say, "ahhh this tastes like summer" and rest assured, this salad will do that.

Hope you're enjoying your weekend so far. Xo.


Ingredients (Adapted from Real Simple Magazine July 2014: Yields 8)
10 cups cubed seedless watermelon
1/4 cup fresh lime juice
1 1/2 lb chopped tomatoes
1/2 sliced red onion
1/2 cup torn fresh basil leaves
2 tablespoons olive oil
3/4 teaspoon salt
1/4 teaspoon pepper

Procedure
1. Combine watermelon and fresh lime juice in a large bowl. Let sit, stirring occasionally, at room temperature for 15 minutes. (The watermelon will absorb the lime juice as it sits.)

2. Add chopped tomatoes, red onions, basil leaves, olive oil, sat and pepper and toss to combine.


Friday, May 30, 2014

NomNom: Banana Ice Cream w/ Sweet and Salty Almonds

As soon as temperatures rise and humiditdy starts to kick in, I crave ice cold refreshing drinks or desserts. I was in NYC over the long holiday weekend and had a serious craving for froyo--specifically the one at 40 Carrots (inside Bloomingdales). The fact that I asked my sister to take me there for the sole purpose of feeding my craving and not care to shop around should be a huge testament that I think their froyo is really, really good.

About a week ago, we had a glimpse of summer in the DMV area and the first thing that came to mind was making this banana "ice-cream." Truth be told, I also felt slightly guilty after working out to indulge in ice-cream so I opted for the next best thing...and well, it's bathing suit season. Enough said.


Did I mention that an ice-cream maker is not needed for this quick and easy recipe?  Major bonus points for that. If you're like me and love banana flavored anything, I promise you'll love this take on ice-cream. The almonds give it that wonderful added layer of crunch which you'll find to be simply satisfying to round out the texture.

Guilt free for reals. Have a great weekend. Xo.


Ingredients (Adapted from It's All Good: by Gwyneth Paltrow) Yields: 4 servings
4 ripe bananas, peeled and sliced into thin rounds
1/4 cup roasted almonds, finely chopped
2 tablespoons plus 2 tsp maple syrup, divided
1/2 teaspoon coarse sea salt
1/2 cup unsweetened almond milk
1 teaspoon pure vanilla extract

Procedure
1. Place banana slices in a single layer on a plate or tray lined with parchment or wax paper; freeze at least 3 hours.

2. In a bowl, combine almonds, 2 tsp syrup and salt. In a food processor, pulse frozen banana slices, milk, vanilla and remaining 2 tbsp syrup, scraping down the sides as necessary, until mixture is the texture of soft-serve ice cream.

3. Spoon into bowls; sprinkle with almond mixture.

Wednesday, May 21, 2014

NomNom: Asian Cucumber and Carrot Salad

It's been about three weeks since I got back from Japan and I've been going through major Japan withdrawal. I unexpectedly fell in love with that country and miss everything about it. The Japanese food I experienced was next level for me.

I went in thinking that I would be diving into the best ramen, sushi, and tonkatsu of my life (which happened) but I didn't expect to love all the various vegetable dishes (many pickled) that were executed so beautifully with great detail and simplicity.


That saying of 'eat with your eyes first' truly resonates in that country. The perfectly placed dishes are neat, colorful, and simply elegant to what makes you think you're looking at art.

I have a new found appreciation with vegetables after the trip and I've been experimenting in the kitchen to try and use only certain ingredients that only enhances the fresh taste of the vegetable. It's still a trial and error process but I'm slowly finding recipes that is pleasing to my palate, and today's recipe is a representation of what I'm referring to.

This humble salad reminds me a bit of Japan due to the Asian flavors it incorporates and the way it highlights the freshness of the veggies involved. It has been on constant rotation in my kitchen because not only does it taste like summer, but it's really, really good. Promise.

Hope you're enjoying your week so far. Xo.


Ingredients (Adapter from www.whiteonricecouple.com)
1 lb cucumber, sliced thin
1 large carrot, julienned
1 tablespoon grape seed oil (or other clean tasting oil)
2 tablespoons rice vinegar
1 teaspoon sesame seed oil
2 teaspoons sugar
2 teaspoons soy sauce
1 tablespoon toasted sesame seeds

Procedure
1. Combine the cucumbers and carrots in a bowl and set aside.

2, In another bowl, whisk together the grape seed oil, rice vinegar, sesame oil,


  • 1 pound (455g) cucumbers, sliced thin
  • 1 large carrot, julienned
  • 1 tablespoon grape seed oil (or other clean tasting oil)
  • 2 tablespoons rice vinegar
  • 1 teaspoon sesame seed oil
  • 2 teaspoons sugar
  • 2 teaspoons soy sauce
  • 1 tablespoon toasted sesame seeds

  • Read more at http://whiteonricecouple.com/recipes/cucumber-carrot-salad/#f5ogK3JDhDHycose.99

    Wednesday, April 9, 2014

    NomNom: Peanut Butter Green Smoothie

    You guys have no idea how happy I am that it's finally starting to feel like spring <insert happy dance>. This winter was brutal for this area where it just seemed like mother nature just would NOT let go of winter. Rude.

    It made me want to stay at home instead of venturing out in the cold and I may have cancelled out on a couple of plans with friends because it was just too dang cold outside to wanna leave the comforts of home. But my friends are the bestest so they get me. It's cool.

    The polar vortex brought out the wuss in me, ok?

    The freezing weather we experienced also made me want to avoid any sort of cold desserts and drinks and unfortunately my green smoothie game suffered. A bad mix of lazy and rebellion towards anything cold related.


    But things are starting to get back on track and I'm back to my green smoothie regimen with a new savory, nutty, and sweet smoothie recipe. My love for peanut butter is next level (especially when there's also banana involved with it) so when I saw that it was one of the ingredients involved, I had to try it. The thing I love about this smoothie is that there are so many awesome layers of flavors that hit your taste buds starting with the banana, a hint of peanut butter, and cinnamon <----game changer for reals.

    So who's with me with welcoming Spring with a super healthy and delicious drink of good-for-you-masked-greens? Let's.do.this.

    Have a great week. Xo.


    Ingredients (Adapted from Bon Appetit) Yields: 2
    1 banana
    1 cup almond milk
    1 cup spinach (torn kale)
    2 tablespoons peanut butter
    1/4 teaspoon cinnamon
    1 tablespoon Chia seeds (optional)

    Procedure
    1. Blend in banana, milk, spinach, peanut butter, cinnamon, chia seed, 1/4 cup of ice in a blender until smooth. 

    Friday, April 4, 2014

    NomNom: M&M Clusters

    When I first entered the working world as a pharmacist, I was very much in work mode 24/7. I'd pick up extra shifts to make extra money and had the mentality of 'work/save as much as I can while young and with out responsibilities.' I still somewhat have that mentality but I've also come to realize over the past couple of years that having balance is something that's becoming more and more important to me. Balancing work, time spent with loved ones, blogging to get my creative juices flowing, traveling the world, and practicing yoga for my well being are all things that are important to me for its own reason and I need a good healthy dose of each to keep me happy.

    Food and my eating habits also involve this balance I'm talking about today.

    I've mentioned in previous posts that I've been trying to eat a bit more healthier these days and not consume so much junk food (chips, fried foods, sweets, etc.) like I usually do, and instead incorporate more vegetables and fruits into my life. So far it hasn't been as bad as I imagined it to be, but I also know myself well enough that I can't give up the "bad for you foods" in its entirety. I enjoy it too much. I'm ok with eating that big slice of cheesecake…and chocolate chip cookie…and bacon…and well you get the idea. It feels so justified after eating a really good spinach salad.


    So where does all this talk lead to today?

    M&M clusters.

    I'm not sure if it's all the carrots and cucumbers I've been snacking on as of late but I've been majorly craving something sweet and salty and this incredibly easy dessert/snack satisfies just that. I first made these clusters over the winter holiday and they have now become a staple in my kitchen because they're incredibly satisfying, easy, and includes ingredients you'll most likely have in your pantry. Warning: there's nothing low fat and healthy about this snack. Oh wait--it has peanuts! Proteins! There you go.

    The hardest part about this recipe was waiting for the chocolate to set so I ate my carrots as I waited. True story.

    Balance.

    I promise my next recipe post will be something super healthy. Have a great weekend. Xo.


    Ingredients (Adapted from America's Test Kitchen)
    8 ounces of white chocolate, chopped or 1 1/3 cup white chocolate chips
    2 cups salted pretzel sticks broken into 1-inch pieces (*make sure you use the thin pretzel rods)
    1 cup salted dry-roasted peanuts
    1/2 cup mini M&Ms

    Procedure
    1. Line a baking sheet with parchment paper.  Microwave chocolate in large bowl until melted, about 1 1/2 to 2 minutes.  Stir until smooth and then gently fold in pretzels and peanuts until evenly coated.

    2. Drop by heaping tablespoons of mixture onto baking sheet.  Sprinkle M&M’s over the top.  Refrigerate until set, about 30 minutes.

    Friday, March 28, 2014

    NomNom: Chia Seed Pudding

    I've been having an ongoing love affair with chia pudding for a little over a month now and I see this becoming a long term thing. It started with this recipe and I've now become hooked on chia seeds. I'm not a huge breakfast person during the work week because I'd rather just use that time to sleep in, but I now have a breakfast rhythm going on. This is where chia puddings come in. I just prep it the night before and store it in the fridge so that it's happily waiting for me in the morning. A quick reach and grab. Done and done.


    It's hard to say which chia recipe I love more because they're both equally awesome--I think I'm more excited that I discovered another chia recipe option that's just as great as the former...you know, in case my palate gets bored.

    This recipe calls for fresh berries and almonds as toppings but it's so yummy just with the simple mix of Greek yogurt, almond milk, and vanilla that I've been eating the pudding as is, unadorned. But if you want to, feel free to go ahead with it. You do you.

    Low in calorie, super healthy because chia seeds are crazy packed with nutrients, and really tasty. It's a trifecta of all.good.things. What's not to love about that?

    Have a great weekend. Xo.


    Ingredients (Adapted from Giada De Laurentiis/Food Network Mag Jan/Feb 2014): Yields: 2
    1 cup vanilla-flavored unsweetened almond milk
    1 cup plain low-fat (2%) Greek yogurt (I used non-fat)
    2 tablespoons maple syrup plus 4 teaspoons for serving (I used agave syrup)
    1 teaspoon pure vanilla extract
    1/4 cup chia seeds
    1 pint strawberries, hulled and chopped
    1/4 cup sliced almonds, toasted

    Procedure
    1. In a medium bowl, gently whisk the almond milk, yogurt, 2 tablespoons maple syrup, and the vanilla until just blended. Whisk in the chia seeds, let stand 30 minutes. Stir to distribute the seeds if they have settled. Cover and refrigerate overnight.

    2. The next day, in a medium bowl, toss the berries with the remaining 4 teaspoons maple syrup. Mix in the almonds.

    3. Spoon the pudding into 2 bowls of glasses; mound the berry mixture on top and serve.

    Wednesday, March 19, 2014

    NomNom: Party Mimosa

    There's something about weekends and brunch that go hand in hand. Perhaps it's the blissful feeling of being able to sleep in sans alarm clock or waking up past breakfast hour.

    Whenever I know I'm going to have a free morning that's not filled with a to-do list or plans made well in advance, I like to invite loved ones over for brunch. Having friends come over your home for a shared meal on the weekend is a great way to start the weekend and when you add champs to that equation, well it's pretty much a guaranteed good ol' time.


    I wanted to update the classic mimosa with exotic tropical fruit juices that reminded me of my recent trip to Belize. While on vacation, my friend and I would crave fresh, sweet, and ice-cold watermelon or pineapple juice everyday from fruit stands and would always be on the look out for any potential juice bars throughout the day. Selling pre-cut fresh fruits on the streets was a normal thing--the fruit in Belize was that good.

    Warning: the combination of flavors in these mimosas (guava, mango, pineapple) have a high potential to make you dream about warm weather, sandy beaches, or a tropical vacation far away. All good things.

    The next time you have brunch at home (much more cost efficient btw), try this easy and tasty juice concoction that will transport you for a brief moment to a warm, sandy beach somewhere with this party mimosa in hand and no worries in mind.

    Enjoy. Xo.


    Ingredients (Adapted from www.allrecipes.com) Yields: 15 servings
    1 (12 ounce) can of mango-apricot nectar
    1 (12 ounce) can pineapple juice
    3/4 cup cold water
    1 (6 ounce) can frozen orange juice concentrate, thawed and undiluted
    1 bottle (750 ml) of cold champagne

    Procedure
    1. Stir together the mango-apricot nectar, pineapple juice, water, orange juice concentrate in large pitcher until combined. Pour in bottle of champagne just before serving.

    Tuesday, March 11, 2014

    NomNom: Mango Coconut Chia Pudding

    I finally jumped on the nutrition train. Well, sorta. I'm not at that point in my life to cut out all sorts of not so healthy for me types of food yet. It's not in the stars for me as of now but I am making a more conscious effort to be more cognizant of what goes into my body. Baby steps.

    If you haven't heard by now, chia seeds have been and still are a major thing in the health food world. I'm usually skeptical in the beginning when there's so much hoopla surrounding the next big "superfood" so I've resisted experimenting with chia seeds for a long time. I suppose that's the rebellious part in me. I dunno.


    So a quick breakdown on these seeds. They are packed with omega-3 fatty acids, protein, fiber, and calcium (up to three times more than a serving of milk!!) and well you get the picture. People use it to sprinkle it in their smoothies, oatmeals, and whatever else the heart desires. I found that boring so after researching a bit more, I found that it's also used to make pudding. These seeds by itself are bland so they need help with taste enhancement which is where the fun experimenting part comes in. I assemble mine in a mason jar to give it a good, solid shake and let it sit overnight in the fridge so it can be part of my morning routine or a a snack I can reach for in the fridge. Did I mention how filling it is?

    I can't get over how the seeds absorb the liquid and expand in size like crazy. The texture reminds me of rice pudding and let me tell you, the combination of the ingredients I'm sharing with you today are WINNING. Chia seeds are legit, friends.

    I now understand what the rage is all about. I'm a believer.


    Ingredients (Adapted from www.SkinnyTaste.com): Yields: 2 servings
    1/2 cup lite coconut milk
    1/2 cup unsweetened almond milk
    3/4 cup fresh ripe champagne mango, diced
    2 tbsp chia seeds
    1 tbsp sweetened shredded coconut
    4-6 drops Agave Nectar (or sugar/honey to taste)

    Procedure
    1. Combine all ingredients in a container. Close and shake well. (I found mason jars work well).
    2. Let it sit for 20 minutes and shake well again. Refrigerate over night or for at least 8 hours.


    Monday, March 3, 2014

    Updates


    Hi everyone! It's been awhile since I've posted here and I want to apologize for the lack of posts in the past month and a half. Life got busy and on top of that I was feeling uninspired. I hear that bloggers go through periods like that so I'm glad to know that it's not just me. I needed to step away for a bit but I'm baaaaaack and excited to share future posts I have planned for you, starting this week. Here's a quick update with what's been going on in the past couple months….


    1. Celebrated my birthday along with my not so little baby boy's birthday. That face is everything.

    2. Started to get back into running, specifically on interval training. I personally think it's tough (it's new to me) but buying new and super comfortable Nike kicks makes the work out bearable.

    3. Have been continuing to check out new restaurants in the DMV area. I've been a bit lazy with taking pics since I knew I wasn't going to post about it but here is one from Water and Wall, a recently opened up restaurant in Virginia worth checking out. The chef also owns the ever popular Maple Ave.

    4. Just got back last week from my vacation to Belize. The weather was warm and sunny, did cave  exploration, hiked through jungles, and took a day trip to Guatemala to see the largest Mayan ruins in the world. This trip also got me thinking of getting scuba certified…seeing the marine life was out of this world. I'm talking about snorkeling next to nurse sharks, sting rays, and sea turtles. It was definitely a new snorkeling experience which I loved and makes me wonder what it would be like to scuba dive.

    5. Decided to make a proactive decision to start eating a bit more healthy. I have been experimenting with chia seeds, new granola recipes, and a flourless brownie recipes that uses black bean. Crazy, I know but it is so good. Will share soon.

    Thanks for being patient with me and I will talk to you soon. Xo.